
by admin | May 30, 2014 | Tips & Tricks
Manual Shutter Speed Settings
To learn about shutter speed settings , the first thing you should do is to consult your user manual, find the appropriate dials, and get familiar with the adjustment and their effects. Next time when you shoot the ultimate wedding video, you get the desired results, fast.
The most common adjustments you can manually change on your camera are the focus, the iris or aperture, white balance and shutter speed settings. Over the years the automatic adjustments in video cameras have improved dramatically. A modern camcorder delivers excellent results in automatic mode. However, there may be some occasions, where you want to achieve a special effect with your shutter adjustment, the backlight is so strong that you need to compensate a little with the manual iris adjustment, and keep the focus on manual so the auto-focus doesn’t get irritated with a constantly changing scene.

Shutter Speed Setting Adjustment
So what is a fast shutter speed for?
If you select a high shutter speed, the camcorder will capture very quick snapshots of the image as it is moving, meaning it appears sharper. There is a downside. Because the image is captured in short bursts the result is that the picture will seem to jump from one frame to the other, giving the clip a jerky movement.
A good application for this effect would be any sports video-making. When watching the footage frame by frame afterwards, you have an excellent tool to analyse your golf swing or tennis technique. With slow shutter speed fast moving objects become a blur. Playing around with shutter speeds is the best way to see what they do, each camera is different.

Take some time to see exactly what yours is capable of, and then use the shutter speed settings which produce the effect you desire. Another interesting effect is the writing on a passing truck. Next time you see one, try it. The signage becomes more readable with certain shutter speeds. Waterfalls and fountains can look amazing, especially when filmed against the brightness of the sun. Using a fast shutter speed freezes the water droplets as they fall down. A slower shutter speed creates a more flowing and softer scene.
by admin | Mar 28, 2012 | Tips & Tricks
External Stereo Recording on a Budget


Flexible and Independent!
The Perfect Audio Recording with zoom, almost as good as a wireless microphone
(audio and video needs to be synchronized in post production)
The Perfect Sound Recording Features
- W-XY mic patterns with 4 mic capsules and signal processing allows Front 90° cardioid,
Rear 120° cardioid and 360° polar patterns
- Built-in USB 2.0 interface
- Records in WAV 96kHz/48kHz/44.1kHz at 16-bit or 24-bit, MP3 to 320kbps and Variable
Bit Rate (VBR) data formats
- Time Stamp and Track Marker functions in Broadcast WAV Format (BWF)
- 512MB SD memory card included
- Accommodates up to 16GB SD memory cards
- Auto Gain Control (AGC) for pristine recordings
- Auto Start function means you’re always ready to record
- Low-cut filter eliminates wind noise
- On-board chromatic Guitar/Bass tuner

by admin | Mar 7, 2011 | Tips & Tricks
Tapes to DVD Transfer – fast and easy!
Allcam/eStudy camera courses and film making tips and tricks. The technical aspects of film and television.
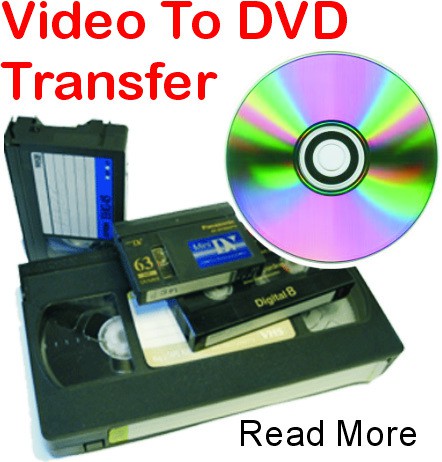
The big advantage of DVD’s is, you can access certain content fast and direct.
When you watch your old wedding video or holiday memories, you can navigate to your favorite spots fast.
Of course you can connect your camera via fire-wire or USB to the computer, open moviemaker or your favorite editing program, start importing your footage and you are ready to go.
However, if you don’t want to do too much editing, the fastest and easiest way is to use a standalone DVD recorder hooked up to a TV monitor for Tapes to DVD Transfer.
First generation copies are not too critical, so you can connect the camera with the AV cables instead of the digital connection. Set the recording settings in the menu of the DVD recorder for best quality and you are ready.
If you like to put the scenes on the camera in a different order or skip some, press the pause button on the DVD Recorder while cueing the tape to the desired spot.
Summary - Tapes to DVD Transfer
For multiple DVD copies record the tape onto the HDD of your DVD recorder first and use the fast copy feature to burn the DVD’s. Additional copies are produced in a fraction of the time!
by admin | Feb 16, 2011 | Tips & Tricks
Choose a camcorder
First of all think about your filming habits
- Do you just need a camera to film the kids, holidays etc?
- Do you do computer editing and upload footage onto the internet?
- Do you do recordings, where sound is critical important?
- Do you need broadcast quality?
Keep the answers to these questions in mind, when you choose your camera.
Which Type? HDD, Flash Memory, Tape, Disc
If you are not into computers, definitely stay with a disc or tape camera. This way you don’t have to worry too much about achieving your footage. Secondly let me tell you, that the picture quality of most camera types in the same price bracket is very similar.

Which features
- 3 chip cameras in combination with a quality lens will give you a better overall picture geometry, contrast and colour impression.
- HD cameras give you a higher resolution, which results into more clarity and picture detail.
There is a set back to it though. Editing demands a lot more Computer power, more storage capacity for larger files and longer upload times to the internet.
- To get the sound right, you want to have external connectors for microphone and head phones.
Which Brand (From a repairer’s point of view)
I have seen expensive and cheap cameras broken down just after the warranty period. Spare part prices are high for almost every brand. Just some brands supply parts quicker than others.
So if you go for a basic camera, I wouldn’t care about the brand. Just follow the trend – if it breaks down, replace it.
Budget There are cheap and expensive cameras available of any type. The special features make it more or less expensive. Once you know what type of camera you want, based on the comments above, type in the camera model in an internet search engine and find the best prices. Once you located the cheapest supplier on the internet print out the page, and go to a local shop. If they have this model, have a play with the camera to see, if you like it. And while you are at the shop, ask to match the price or give a discount.
2ndHand. When you go for this option, definitely go through the camera check procedure as described in a previous article,
Camera check and maintenance Since cameras can have intermittent faults, which can be heat related, expand recording and playback times to an hour or longer.
by admin | Feb 16, 2011 | Tips & Tricks
How to Avoid Camcorder Error Message
Camcorder Error message, not accepting -, or ejecting-, chewing tapes, line bars and pixelation during playback – Sounds familiar? Do you want to know why these issues occur and how to avoid them? During my work as a camera technician I have repaired thousands of camcorders and other video equipment, from VHS and Betacam in the early days to Digital8 and mini-DV.
The latter format, mini-DV, delivers by far the best picture, but there is a downside…
In my experience it is the most sensitive tape format to different tape surfaces and damaged tape cassettes.
Let me explain a Camcorder Error Message
due to the high data volume on a physical small tape, the tape path and transport in the tape mechanism of the camcorder has to be very precise. Tolerances in tape path alignment and tape tension in the beginning and end of the cassette need to be very accurate. Sensors inside the recorder mechanism control tape tension, transport speed, and video head drum speed at all times. Even if the tape loading and unloading is slightly delayed, for whatever reason, the computer of the control logic shuts down the whole camera and displays an error message to prevent any damage to the tape or camcorder. A fingerprint on the tape can cause enough friction to slow down the video head drum, that the servo circuit cannot compensate and the system control shuts down the camera.
In theory as well as in real live it is very likely that a damaged tape inserted in a newly repaired camcorder can cause malfunction or any of the other symptoms described above. Usually the damage is not as bad as in the first place when the tape got damaged by the faulty camera, but it is recommended, to get the camcorder checked out first, before you try a different or new tape. For more details of what you can do in this case, click Camera trouble shooting.
It goes even so far, that some camcorder models are sensitive to mixing different tape brands, as the residue of some tape material doesn’t mix well with others, or the tape tension and friction upsets the tape mechanism in the camcorder. This particularly applies to mini DV tapes with playing times of 120min or more.
Repairs of a damaged Mini DV tape – As you can imagine now, this can be a tricky subject.
- If there is any damage to the cassette housing, it is recommended to find an old mini DV tape, which has a cassette compartment hold together by screws and replace the whole housing without touching the tape with your fingers.
- Splicing the tape itself, is a very delicate work and should be done by a professional, as the joint itself, if not done properly, can damage the video heads. The loss of the damaged tape, which has been cut out is usually insignificant, as a few centimetres of tape represent only a few seconds of video footage.
- Once a spliced tape is successfully repaired, I still recommend to use it only once or twice to avoid any damage to the video head.
Summary, conclusion and recommendations
- Try to use the same brand of tapes only
- Avoid to use tapes longer than 90min
- Discard damaged tapes
- Be careful with head cleaning tapes – see video / article…
For more technical details about Camcorder Error Messages including tape- DVD- HDD and flash memory I recommend...
by admin | Feb 16, 2011 | Tips & Tricks
Save Money Camera Repairs
Take care of your camera and avoid more than 70% of all repairs
How to get the most out of your camera and save money on camera repairs
A summary based on 1000’nds of cameras of all brands I have seen and repaired.
The weak spots of the camera:
- LCD display – Glass! Easily broken, when knocked or pressure applied!
- Media compartment
- CF Card – long pins inside the camera need to access contacts inside the little holes of the card. Even tough the card has groves along the side, which act as guide rails, I have seen cameras with damaged card slots. Pins easily break off or bend, when not careful during seating or extraction of the card.
- Tape mechanism – very delicate and flimsy – don’t apply any pressure, when loading or removing the tape! Keep it clean and shut, when not used.
- Disc mechanism – not too bad, just watch discs for fingerprints and scratches, of course.
- Extendable lens – jammed lens sections due to dirt, sand and impact. So keep it clean, free of dirt and sand at any time. Make sure the lens is inside, when the camera is not used!
Self induced faults: Liquid, Sand and shock damage make up about 70% of all repairs
Water and liquid damage
There are three things to look out for, when the camcorder comes in contact with a liquid.
a. Most liquids are conductive and short out circuitry inside the camcorder.
b. Corrosion occurs, when the liquid reacts with the copper tracks or other components on the
circuit board and mechanism. Seawater is one of the worst liquids, as it reacts with most of the
components inside the camera.
c. In the mechanism the tape gets stuck on the metal parts, such as video head drum and prevents it
from spinning. Most liquids leave a residue, which mal function the recorder mechanism.
What to do, to minimize the damage
Liquid damage - Save Money Camera Repairs
No matter how badly the camera is affected by the liquid, the first thing you should do, is to disconnect the battery or power source, to prevent any shorting of the circuitry.
Once the camera has been dried, try to eject the tape or other media and use a different one for testing. If this does not help or your camera has been immersed in water, bring it to a repairer as soon as possible to prevent any corrosion.
Save Money Camera Repairs - Sand damage
Any sand or dirt damage, the first thing you should do is to disconnect the battery or power source.
Secondly, clean the camera thoroughly with a small dry brush and cloth. Now reconnect the battery, press eject and remove the tape or other media. Leave the cassette compartment open and remove the battery. When you see sand grains inside the media compartment, just blow it out with compressed air. Try to avoid touching any components, as they can be very delicate, particularly in a tape mechanism.
If this procedure was not successful, the camera needs to be booked in with a repairer.
Shock damage - Save Money Camera Repairs
The only thing you can do in this case is to reset the camera by disconnecting the battery or power source for a few seconds and then connecting it again. Try to remove the cassette and then reload again. If unsuccessful, see a repairer.
Damage Prevention – this applies to all cameras
Very important – have your camera bag sand free and clean from the inside.
Don’t store any liquids like water bottles etc. in your camera bag, just in case.
- Use a padded bag from all 6 sides
- Transport and store camera without accessories attached. Keep camera in a separate compartment, away from other things. This way the camera is less bulky, lighter and therefore less prone to damage.
- Lens filter for protection – most lenses are none serviceable items and need to be replaced as a complete unit.
- Take your time during loading and unloading of the cassette, disc or memory card. Do not be rushed and apply any force during this procedure. Get into the habit of closing the cassette compartment where it says ‘push’ on the door.
- Keep the camera in plastic zipper bag inside your padded camera bag, to prevent any sand damage on the beach, or from water/rain damage etc.


 Online Repair Estimate

 Facebook
 LinkedIn