by admin | Feb 22, 2011 | DIY Repairs
LCD Screen Replacement explained
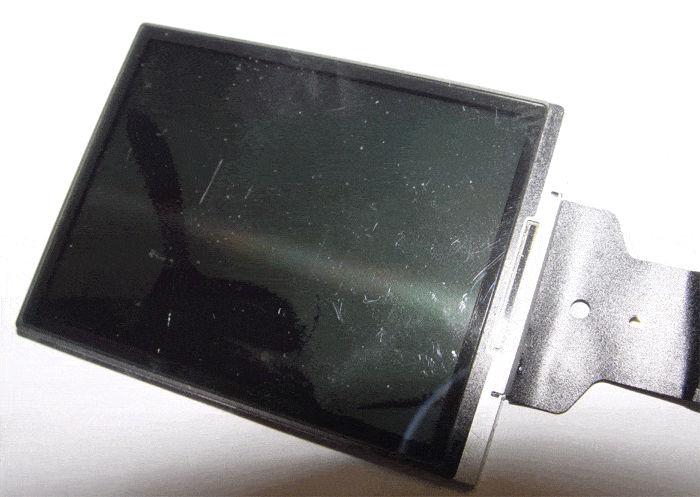
The LCD display consist of a thin glass layer which is often directly exposed at the back of the camera housing.
Symptom: Crack in the glass and distorted display. A dark screen can be caused by a faulty back light unit or some other electronic issue.
Important: Test all other functions of the camera by connecting it via the A/V cable to a TV monitor. If you find some other faults with the camera, it might be questionable if it is worthwhile to proceed with the LCD replacement.
LCD Screen Replacement:
The disassembling procedure is often unique to a particular model. Some are more easier or difficult than others. However, after you have undone the screws, a back and front housing part can be separated. Once the back cover is removed, you may have to remove a circuit board to gain access to the connector which holds the LCD flexible circuit board. Unclip and remove the LCD.
In most cases the new LCD screen comes separate from the back light unit. In this case I would like to advice to work with a fibre cloth to keep the back light unit and the new LCD display clean during disassemble and assemble procedure. Make sure you remove all fingerprints, dust and dirt, as it will be visible once the screen lights up.
Assemble the camera and you are done.
General advice
Don’t be tempted to use any shortcuts during the disassemble procedure to access to remove the faulty component for repair or replacement. Go as far as you need to comfortably gain access to the faulty part. If not you may accidently pull of cables or tare flexible circuit boards. Pay particular attention to the release of circuit board connectors, some of them easily snap off.
If your camera fault is not listed or you need advice with your particular camera issue go camera repairs for a free estimate.

AllCam Camera Repairs
- Fast Free workshop Estimate
- Australia–wide send in service
- ALL BRANDS, Video & Photo
- Professional & Domestic equipment
- Very competitive rates
- 6 month warranty on repairs
- 24/7 online job tracking
- Technician advice
by admin | Feb 22, 2011 | DIY Repairs
Symptom for Lens Repair: Lens shutter doesn’t open and/or lens doesn’t extend or retract. In addition the display shows an error message and the camera makes a beep noise.
Caution: This repair applies only to sand and dirt damaged cameras. Impact damaged cameras usually require a whole lens replacement, which is most likely an uneconomical repair.
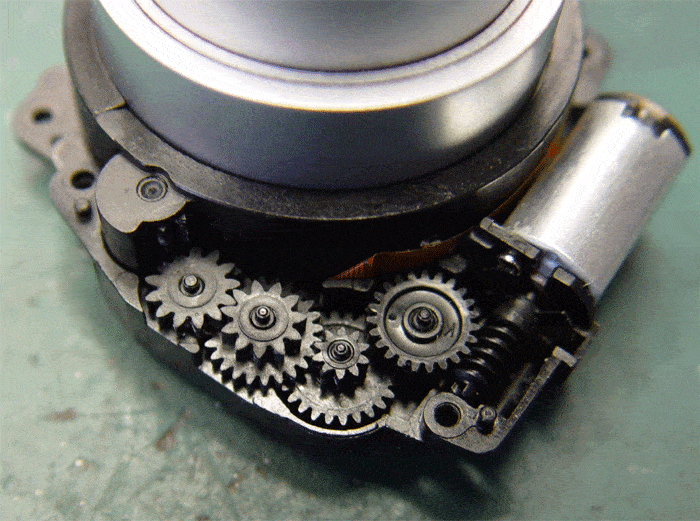
In most cases it is sand grains and dirt inside the gearbox, which drives the lens segments in and out. In order to clean the lens and gearbox the whole lens assembly needs to be pulled out of the camera.
To drive the lens motor manually, we use a variable power supply at the motor terminals of the lens mechanism. Furthermore you need a brush to clean the camera before and while disassembling. You can use compressed air in hard to reach places.

Lens-gear-box
Repair/Replacement
In most cases you have to undo the screws and remove the back cover, the LCD screen and perhaps a circuit board or two. Once you have access to the screw which hold the lens inside the housing, undo them, disconnect all cables and flexible circuit boards and remove the whole lens assembly including CCD and gear box at the side. With just the lens assy in front of you, remove the screws and cover of the gear box. Take out any dirty gears and clean all the teeth with a brush or compressed air. Now assemble the gearbox and apply 3-5V from your variable power supply at the terminals of the motor. Once the lens extends and retracts smoothly, you can start assembling the camera in reverse order. If not you may want to repeat the cleaning procedure again. After the cleaning the lens should work fully in and out even with lower voltage without any stopping.
After you assembled the camera check it in all functions.
Good luck and great success with your lens repair.
If your camera needs a lens repair or has a fault is not listed and you need advice with your particular camera issue click on the logo below.
For free repair estimates

- Fast Free workshop Estimate
- Australia–wide send in service
- ALL BRANDS, Video & Photo
- Professional & Domestic equipment
- Very competitive rates
- 6 month warranty on repairs
- 24/7 online job tracking
- Technician advice
by admin | Feb 22, 2011 | DIY Repairs
Camcorder CCD Sensor Replacement Procedure
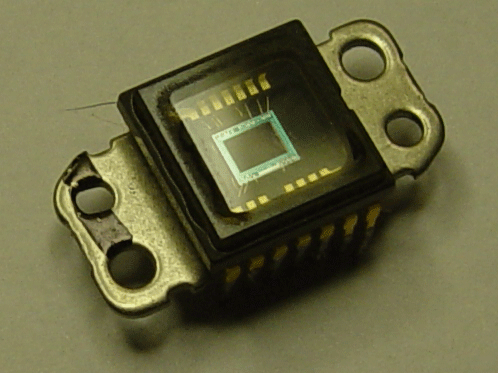
Symptom for ccd sensor replacement: No Camera picture or fine vertical lines in camera mode, sound is normal. Playback is OK.
Caution: Watch correct optical filter placement during assembling
Alignment/adjustment checks: Focus tracking and zoom
Single Chip only, 3chip camcorder requires the whole optical block replaced, which consists of 3 CCD’s and prism.
ATTN: No camera picture or black screen can also be caused by a faulty iris inside the lens assy!
Check: unscrew the CCD, leave the ribbon cable connected and pull the CCD slightly away from the lens. If the monitor lights up with some sort of picture, the lens causes the problem, not the CCD!
Repair/Replacement
Unscrew and disconnect the whole CCD circuit board. Put just this circuit board on your workbench to avoid any damage to the ribbon cable or other parts of the camera.
As the pins of the CCD are often soldered at the top and bottom of the circuit board, it can be a challenge to remove the CCD without damaging the circuit board. My advice is to work with flux and/or special SMD removal solder. This solder stores the heat, the solder stays liquid and the whole CCD can be removed at once. Before placing the new CCD onto the circuit board, make sure all holes and connections are clean and no old solder is shorting any components.
Now place the new CCD the same way as the old one and resolder the pins. Fit the rubber spacer and the optical filter before placing the circuit board behind the lens assy. Now screw the CCD circuit board and you are done!
Often you must connect all cables, circuit boards and assemble the camera before you can switch it on and see if your repair was successful.
Check focus in wide angle and full telephoto position.
Usually there shouldn’t be any issues. However if there is an focus problem the camera may need to be adjusted with a computer, (alignment and adjustment procedures in the service manual).
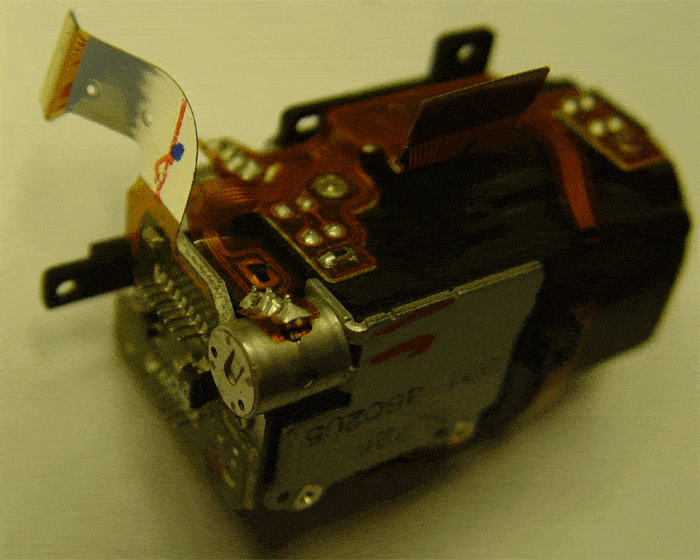
CCD on lens assembly

CCD sensor
If your camera fault is not listed or you need advice with your particular camera issue click on the logo below.
For free repair estimates

- Fast Free workshop Estimate
- Australia–wide send in service
- ALL BRANDS, Video & Photo
- Professional & Domestic equipment
- Very competitive rates
- 6 month warranty on repairs
- 24/7 online job tracking
- Technician advice
by admin | Feb 22, 2011 | DIY Repairs
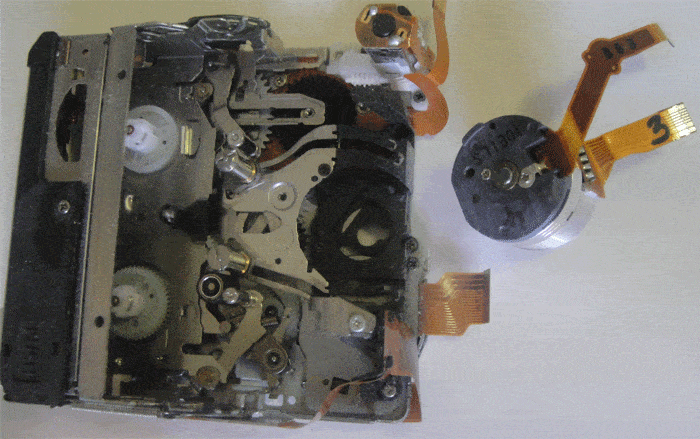
Video Head Replacement Symptom: No playback picture, grey or blue screen. Three to five wide horizontal lines across the whole screen, or pixilation in playback.
Alignment/adjustment check: Check playback picture and audio with a pre-recorded tape and do own recording in LP and SP.
Caution: Tape-path check and alignment after the video drum has been replaced.
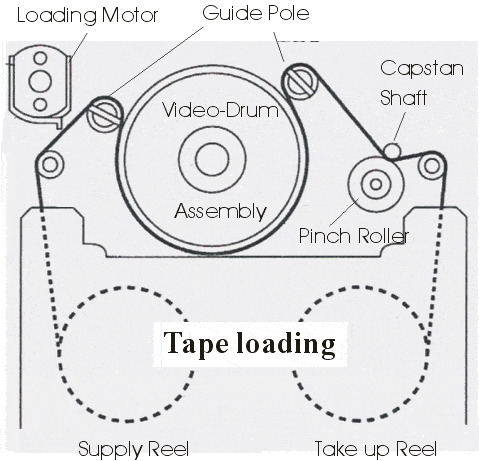
- The camera needs to be dismantled to remove the whole recorder mechanism for Video Head Replacement. Disconnect all cables and flexible circuit boards from the mechanism to the circuit board before unscrewing and removing the tape drive.
- Drive the upper chassis in fully eject position with an external variable power supply.
- Unscrew the three screws which hold the video drum assy and remove it.
- Place and screw the new video heads onto the chassis.
- Connect the chassis to the circuit board and refit the board.
- If the camera has tape path alignment holes in the outside housing, you can continue to assemble the whole camera for testing and tape-path alignment.
- If not you have to assemble the camera partly to a point where you can switch it on, load a pre-recorded reference tape, put the camera in playback mode and have access to the front of the mechanism where you can perform the tape path alignment.
- Use an oscilloscope and back tension tape if you have one.
- If not align the camera for perfect playback picture and sound! Don’t forget to check CUE and REW.
- Once the camera is assembled, check all functions in record and playback again.
Mini DV Tape Drive and Video Head Replacement
If your camera fault is not listed or you need advice with your particular camera issue click on the logo below.
For free repair estimates

- Fast Free workshop Estimate
- Australia–wide send in service
- ALL BRANDS, Video & Photo
- Professional & Domestic equipment
- Very competitive rates
- 6 month warranty on repairs
- 24/7 online job tracking
- Technician advice

by admin | Feb 22, 2011 | DIY Repairs
Tape Drive Replacement Procedure
Symptom for tape drive replacement: Physically damaged tape loading mechanism, doesn’t release tape or cassette compartment doesn’t stay closed without tape.
Caution: Tape drives are supplied without video head drum.
Alignment/adjustment check: Tape path needs to be checked and aligned.
Repair/Replacement
- The whole camcorder needs to be dismantled
- All cables and flexible circuit board going to and coming from the mechanism need to be disconnected.
- Remove the tape drive
- Put the upper chassis into the up or eject position with the help of your variable power supply.
- Undo and remove the three screws which hold the video drum assy.
- Remove the drum assembly and refit it in the new tape drive.
- Lower the chassis with the power supply before camera assembly.
- Screw tape mechanism into the chassis, refit circuit board and connect all cables from and to the tape drive.
- If the camera has tape path alignment holes in the outside housing, you can continue to assemble the whole camera for testing and tape-path alignment.
- If not you have to assemble the camera partly to a point where you can switch it on, load a pre-recorded reference tape, put the camera in playback mode and have access to the front of the mechanism where you can perform the tape path alignment.
- Use an oscilloscope and back tension tape if you have one.
- If not align the camera for perfect playback picture and sound! Don’t forget to check CUE and REW.
- Once the camera is assembled, check all functions in record and playback again.

Mini DV Tape Drive and Video Head Drum
If your camera fault is not listed or you need advice with your particular camera issue click on the logo below.
For free repair estimates

- Fast Free workshop Estimate
- Australia–wide send in service
- ALL BRANDS, Video & Photo
- Professional & Domestic equipment
- Very competitive rates
- 6 month warranty on repairs
- 24/7 online job tracking
- Technician advice
by admin | Feb 22, 2011 | DIY Repairs
Symptom for Card Holder Replacement: Bent and/or broken pins inside the CF card compartment. Error message, can’t record or review images.
Caution: If the camera doesn’t power up, the pins may have shorted the circuit board in which case it needs to be replaced as well.
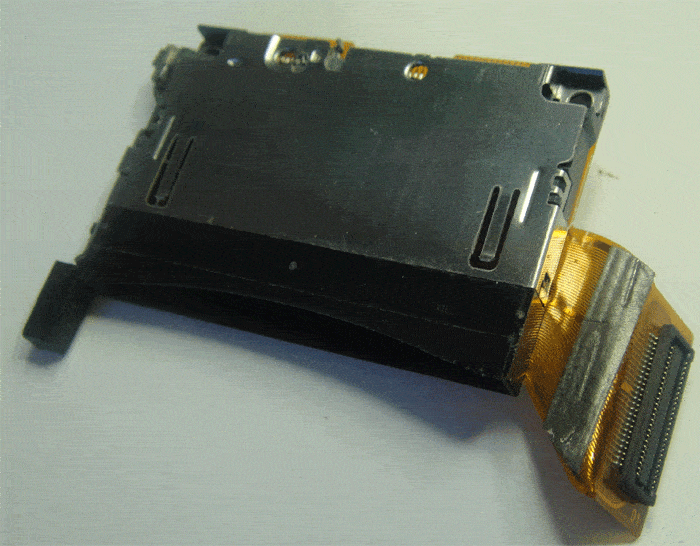
Some manufactures supply the CF Card holder mounted on a small circuit board which can easily replaced, other need to be soldered onto the main board. In most cases the card holder has a multi-pin connector, which easily plugs into the main circuit board.
In any case, once the holder has been replaced, the camera needs to be assembled and tested .
Make sure the card can easily insert and ejected.

CF-card-holder with multi pin plug
If your camera fault is not listed or you need advice with your particular camera issue click on the logo below.
For free repair estimates

- Fast Free workshop Estimate
- Australia–wide send in service
- ALL BRANDS, Video & Photo
- Professional & Domestic equipment
- Very competitive rates
- 6 month warranty on repairs
- 24/7 online job tracking
- Technician advice


 Job Track online 24/7
 Online Repair Estimate

 Facebook
 LinkedIn